

Create a plate material
Organization administrators can create a material in Organization settings → Materials and service. In New material:- Enter the supplier or formal material name.
- Optionally add an Internal label, such as
Soft 5 mm. This is your organization’s shorthand and appears under the formal name in Inventory. - Choose the type Plate and complete the relevant price, distortion, and review fields.
- Select Add material.
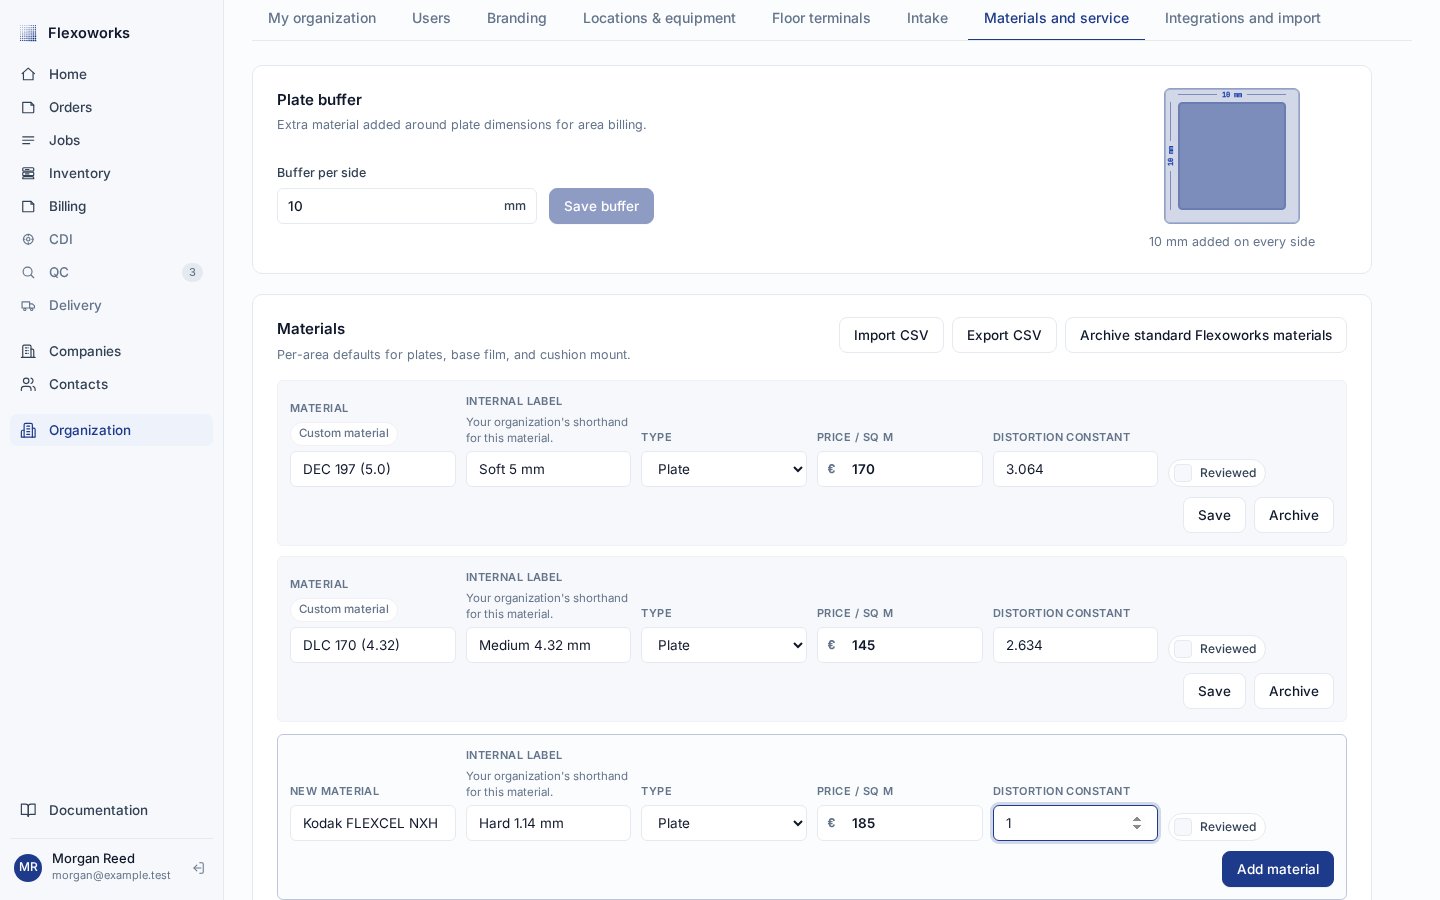
A plate material can keep its formal name and an optional internal shorthand used by your team.
Receive boxes or loose sheets
Open Inventory and select Receive plates. The same two-step wizard handles box labels and the familiar manual form. Stock is counted in sheets, not boxes.Photo or manual
Check & receive
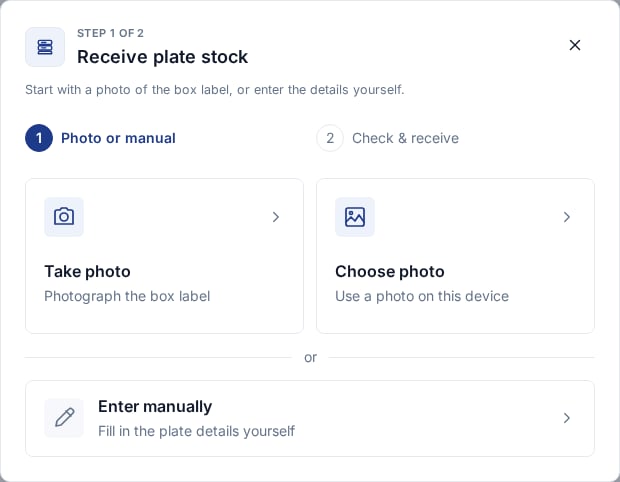
Start with a new photo, a saved photo, or the familiar manual form.
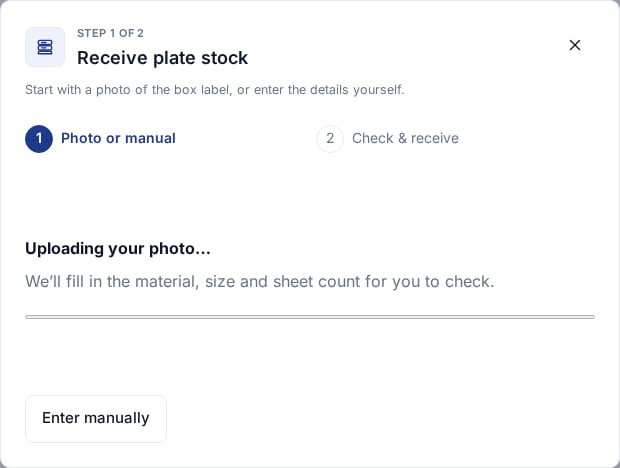
The progress screen stays visible while the label is being read. Manual entry remains available.
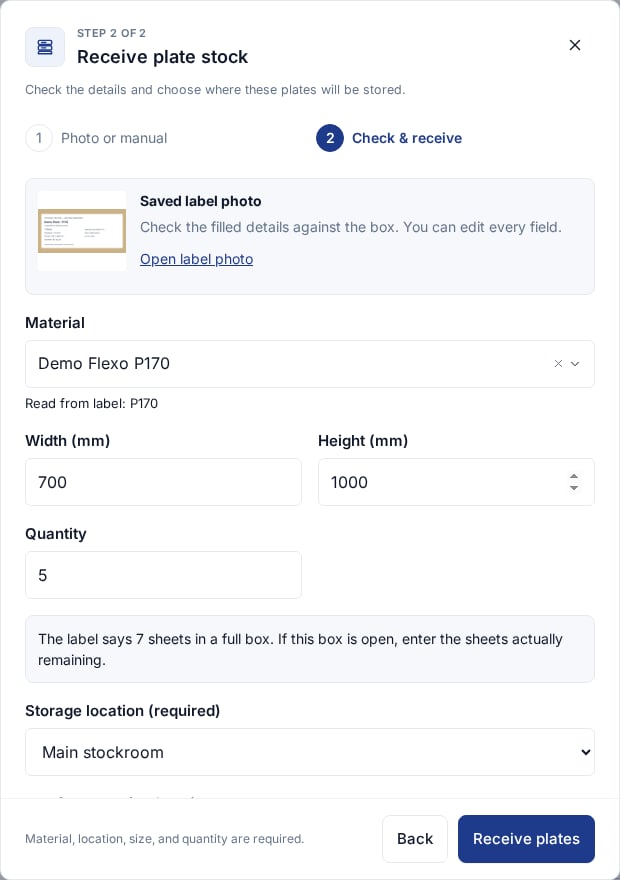
Check the saved photo and filled fields. In this example the label says 7 sheets, but only 5 are being received.
Count sheets, then record box details
For a sealed full box, check the printed number of plates. For an opened box, count the sheets actually remaining and enter that number in Quantity. Photo recognition keeps the printed count automatically with the receipt. There is only one editable quantity: if the label says 7 plates but 5 remain, receive 5. Do not enter1 just because you are adding one box.
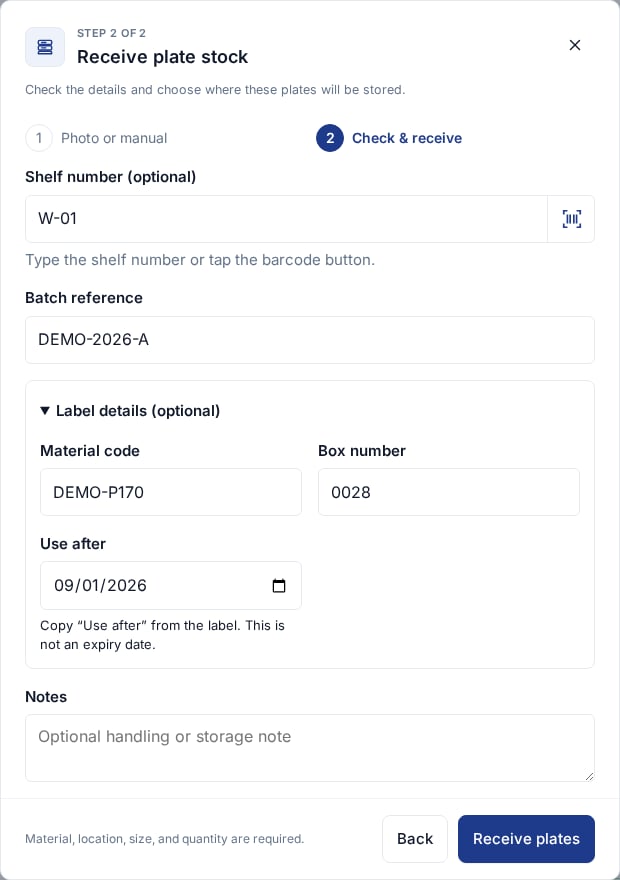
Keep the batch, material code, box number and Use after date with the receipt.
Add more than one box
Receive each labelled box separately so its own batch, box number, photo and quantity remain traceable. Finish the first receipt, then open Receive plates again for the next box. Boxes of the same material can have different sizes or pack quantities; check each label. Identical sheets may appear together in one stock row. That row’s quantity is the number of sheets, not the number of boxes. Open its activity to see the separate original receipt details.Enter details manually
Choose Enter manually on step 1 to skip the photo. The existing material lookup, recent/common size suggestions, quantity, batch and notes are still available. Choose the material, fill the size and quantity, select a location, optionally add shelf and label details, then select Receive plates.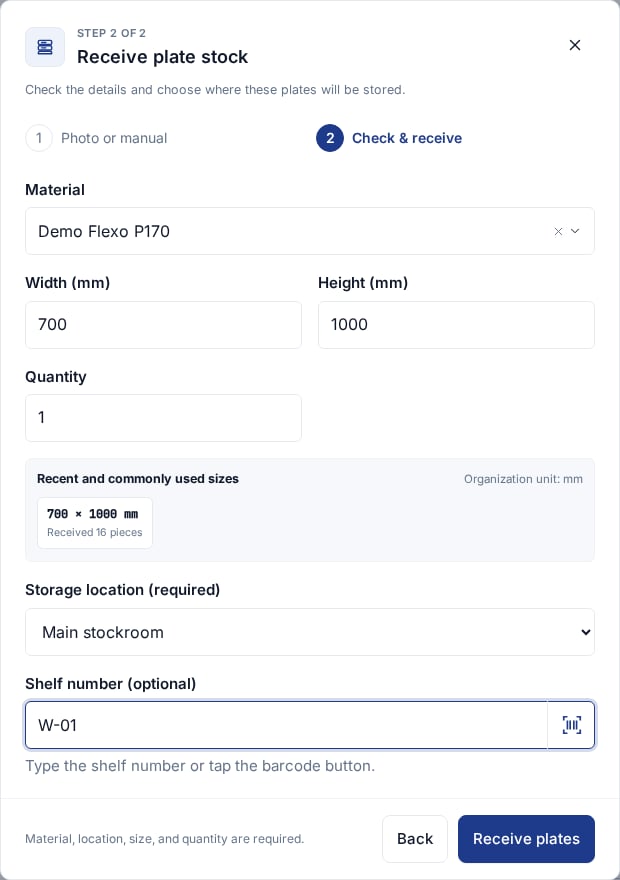
Manual entry uses the same form and retains recent and commonly used sizes.
Go back, close or retry
- Back returns to step 1 and keeps entered values. Choose Enter manually to return to them, or select another photo to refill the form.
- The X at the top right closes an unsubmitted wizard and clears that draft. There is no separate Cancel button. Refreshing an open review restores its draft and saved photo in the same browser tab.
- If analysis fails or a field is unreadable, try a clearer photo or use manual entry. Supported images are JPEG, PNG, WebP and HEIC, up to 12 MB.
- If the receipt response is interrupted, use Check / retry receipt. It checks the same request without adding the stock twice, including after a refresh.
- If a box appears to have been received already, check its code, batch, box number and stock history. Continue only for additional physical stock and provide the requested explanation; do not receive the same box again.
Scan shelf and box barcodes
Use a photo of the whole box label to fill a receipt. The barcode button in the shelf field is for shelf identifiers. It does not look up a supplier box, fill its material or calculate how many sheets it contains.Scan a shelf with your phone
- Select the required storage location first.
- In Shelf number (optional), tap the barcode icon inside the right edge of the input. Allow camera access if the browser asks.
- Point the camera at one shelf barcode, such as
A-03. Scroll inside the dialog if needed to see the preview and its controls. - Check the displayed reading, then tap Use shelf A-03. The camera closes and the value appears in the shelf input. Scanning does not submit the form.
- Finish checking the receipt and select Receive plates.
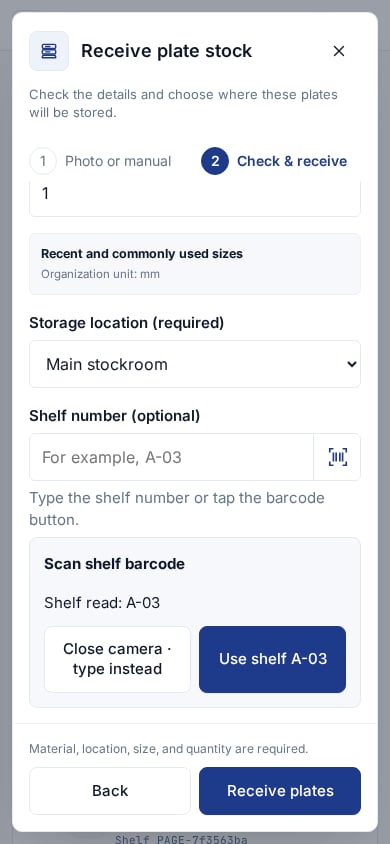
Tap the barcode icon in the shelf field, aim at the shelf label, then check the result before using it.
Use a handheld scanner or type instead
A USB or Bluetooth scanner configured to act like a keyboard can enter text into the focused field. Click Shelf number, scan the shelf barcode and check the value. You still finish the receipt with Receive plates. To find an existing box, click Search inventory and scan a supplier barcode whose decoded text matches a stored material code, batch or box number. You can also type the printed code. Search does not receive stock, and a barcode is not a guaranteed match if it contains a different identifier or several combined values. Check the label and search its printed material code or box number instead. If camera access is unavailable or the reading is wrong, select Close camera · type instead and enter the shelf number yourself. Check that you are scanning the shelf label rather than a barcode on a box.Read the grouped inventory list
One Inventory row represents plates with the same:- material;
- physical size;
- dimension unit;
- current location; and
- shelf (including no shelf).
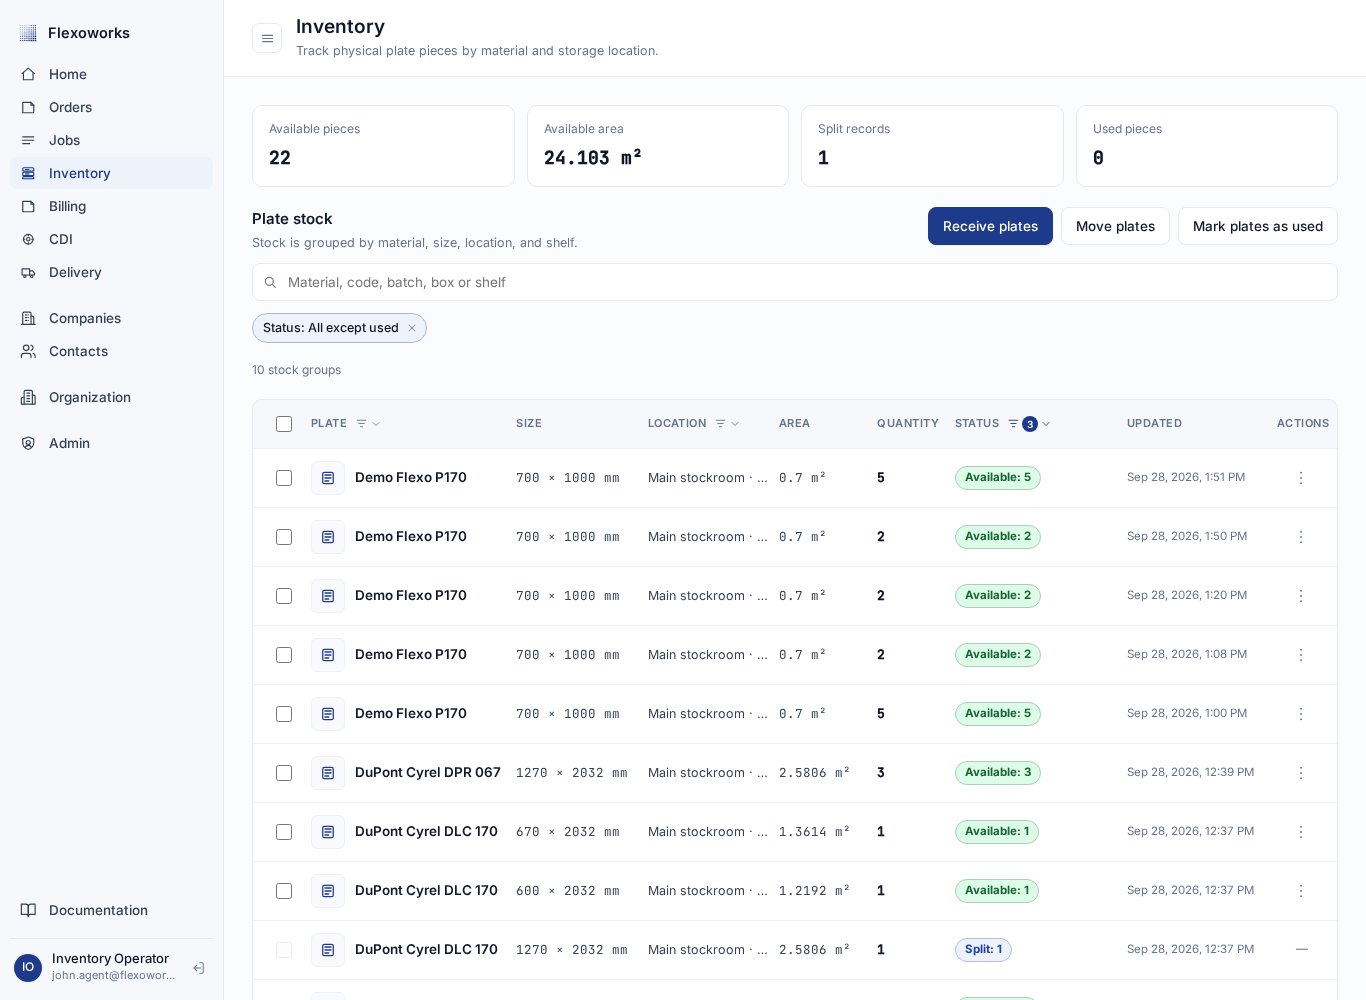
The list groups equal stock, shows quantity and status counts, and places the most recently changed group first.
Find the stock you need
Click Search inventory above the table and enter one identifying value. Results update as you type; you do not need to submit the search.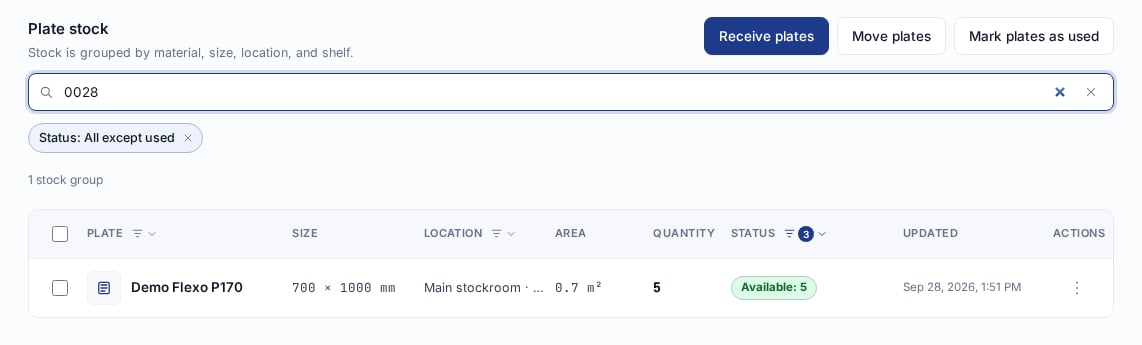
Searching for box 0028 finds its matching sheets; the quantity shown is 5 sheets, not 5 boxes.
Split one plate
Splitting represents one real straight cut through one available plate:Open the quick actions
Choose the cut direction
Check the resulting sizes
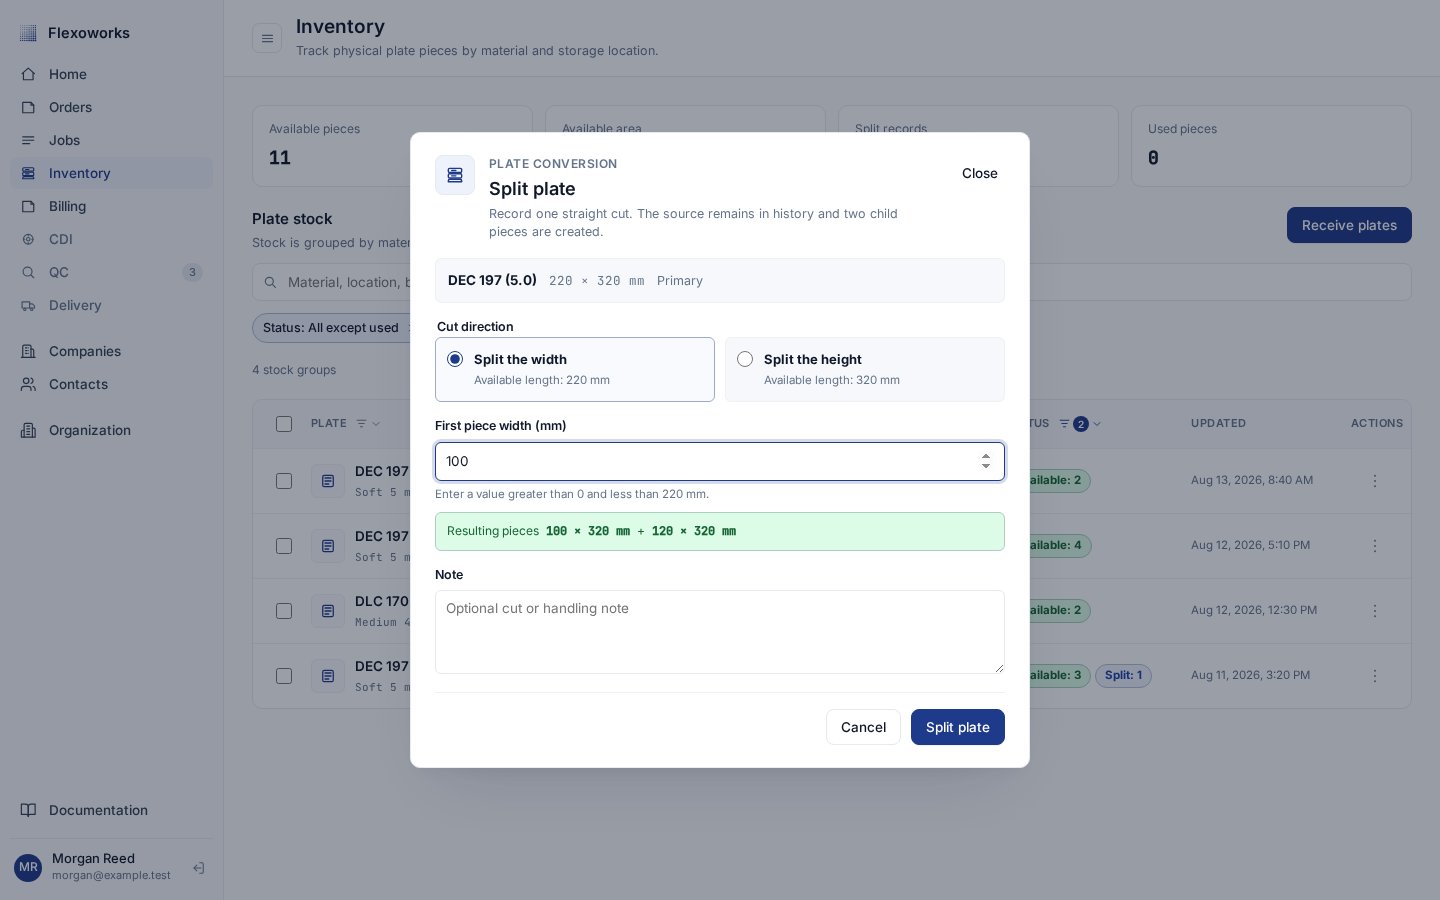
A split is one straight cut: enter the first length and verify the two resulting plate sizes before saving.
Move plates
The top of Plate stock always offers Receive plates, Move plates, and Mark plates as used. You can start a move or record use without first selecting a row in the table.Choose available stock
Choose the destination
Check quantities and confirm
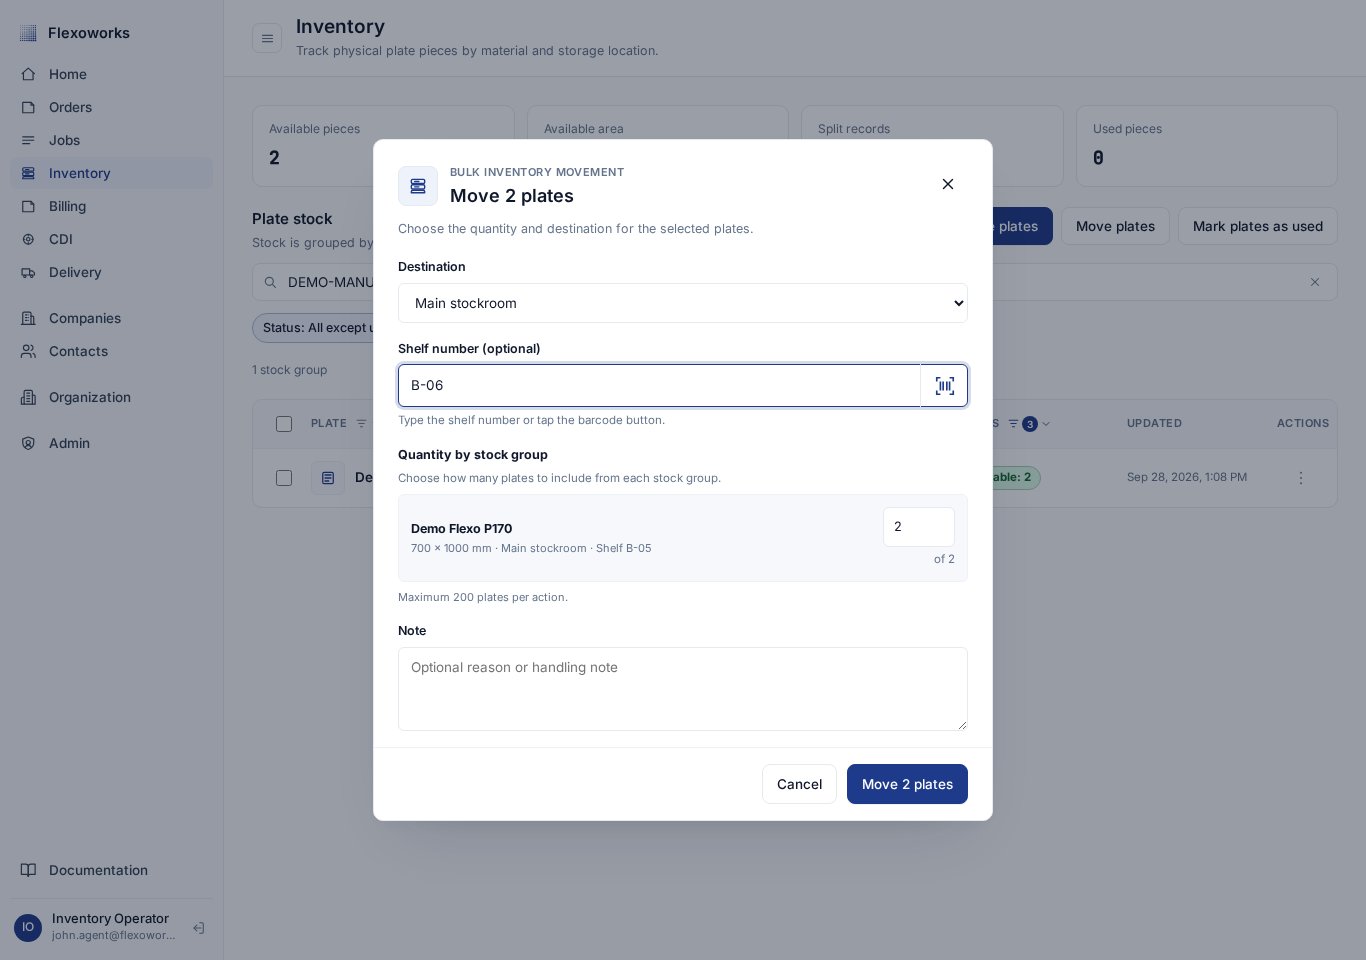
Choose the destination first, then review the quantities and optional note.
Mark plates as used
Use this action to remove plates from available stock because they were sold, used, or found defective. A linked job is not required.- Select Mark plates as used at the top of Inventory. Choose stock and Continue, or start with groups already selected in the table.
- Choose a Reason (required). There is no preselected reason.
- Review the quantity for each group. Set unwanted groups to zero; one action can include up to 200 plates.
- Optionally select a Job / production line and add a Note.
- Select Mark [quantity] plates used to save.
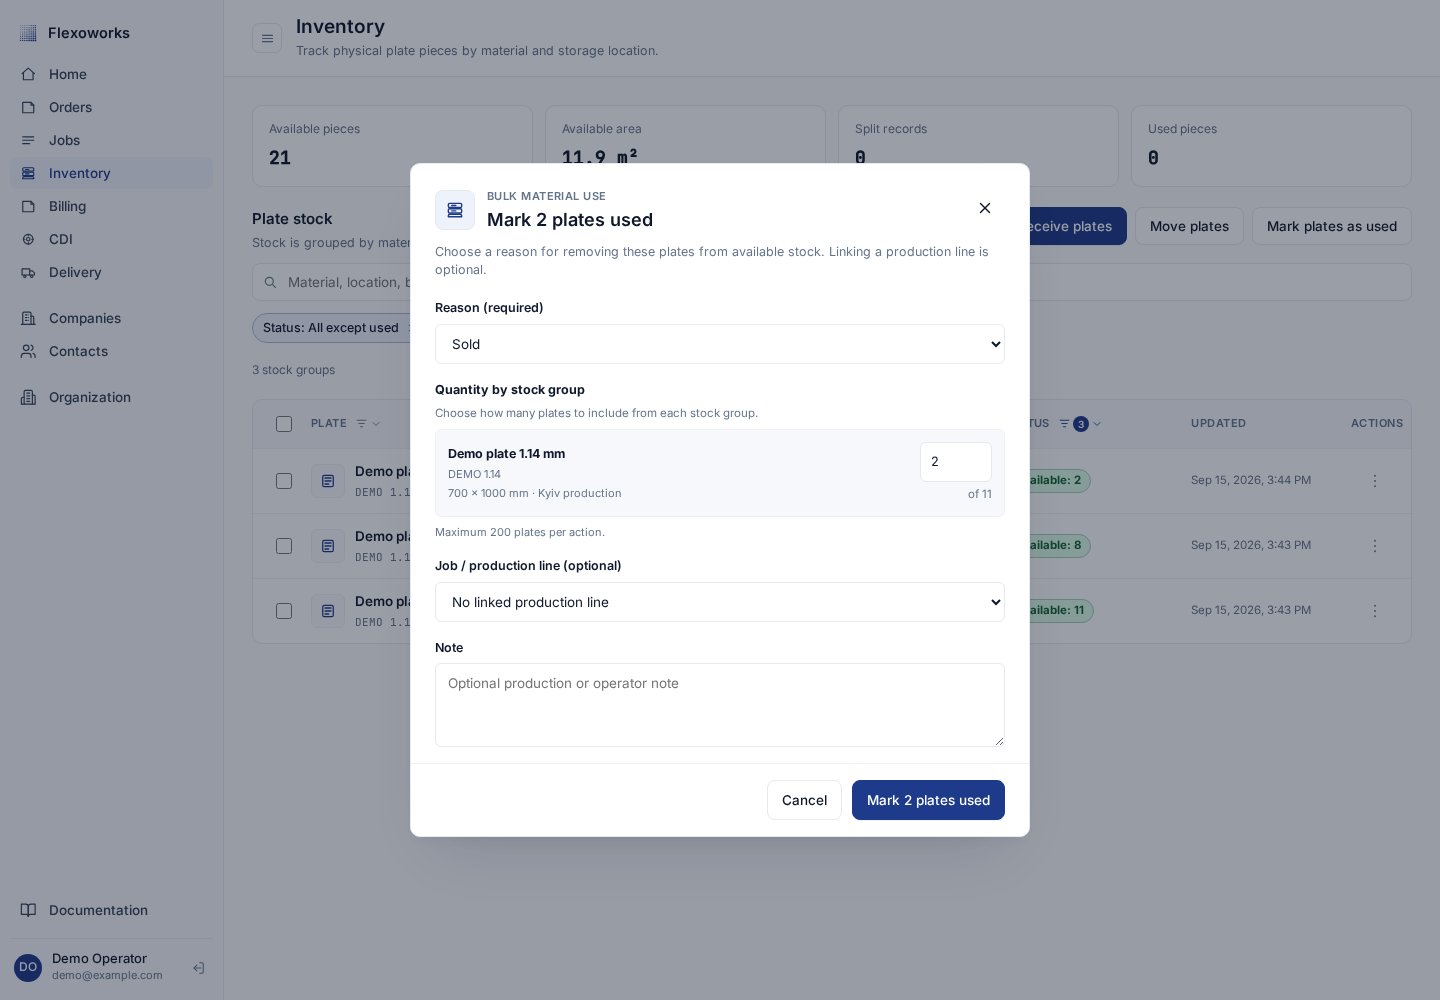
The reason is required; the job link and note can remain blank, including when matching production lines exist.
Review stock activity
- Find the stock by material, code, box number or shelf.
- Click the stock row outside its checkbox and action buttons. Group activity opens on the right.
- Check the material, dimensions, location and shelf at the top to make sure this is the intended group. Read the events for who changed stock, when, and any recorded note or production-line link.
- Select Load older events when it appears to see earlier events and additional receipt details.
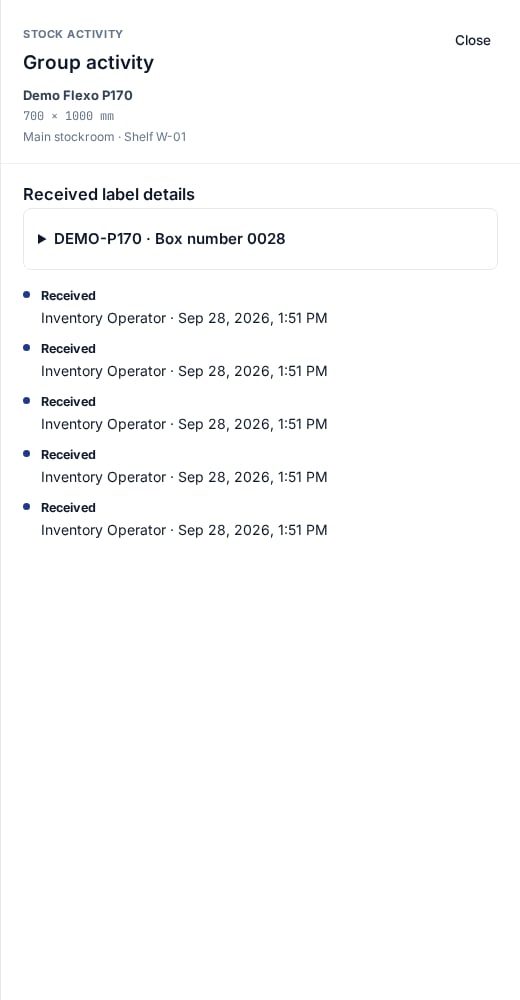
Group activity records receipts and later stock actions with the operator and time.
Check the original box label
Under Received label details, expand the relevant receipt, such as DEMO-P170 · Box number 0028. Check its received Quantity, printed Sheets in a full box, batch, material code, box number and Use after. The received quantity is the original receipt amount; use the stock list to check what is currently available. Original location and Original shelf show where this receipt first entered stock, even after a move. If a duplicate-box override was used, its explanation appears here too. If a photo was saved, select Open label photo to show it in the drawer. Select the image to open it larger in another tab. Manual and older receipts may have no photo or optional label details. Cuts retain their original receipt and photo, so you can check where the remaining pieces came from.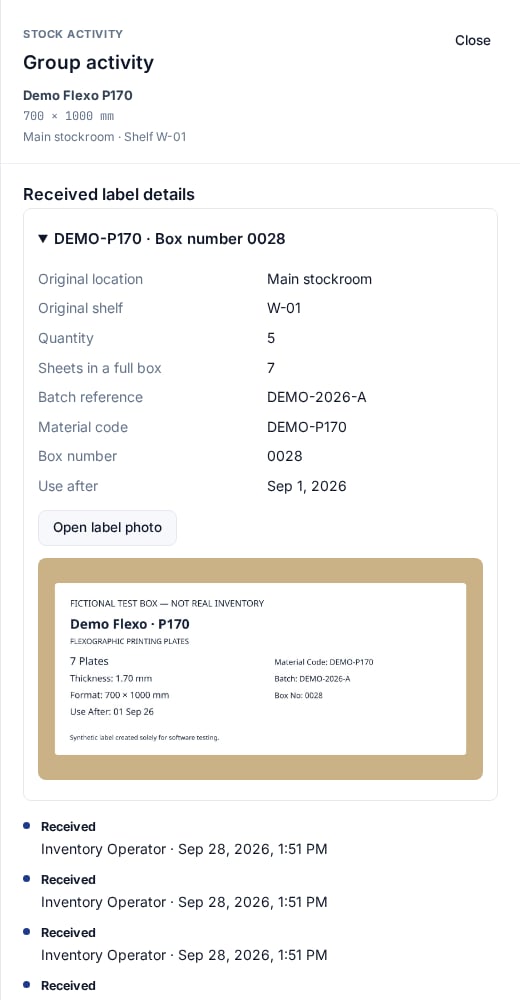
Expand the receipt to compare its saved facts with the original label photo.
Work on a phone or tablet
The same three top actions and row menus are available on smaller screens. In move and use forms, the destination or required reason appears before the quantity list. Scroll inside the dialog to review a longer selection and its optional fields; the action buttons stay visible at the bottom. In receiving, Back returns to the method choice and Receive plates saves the checked form. Submitting a use action without a required reason focuses the reason field so you can complete it.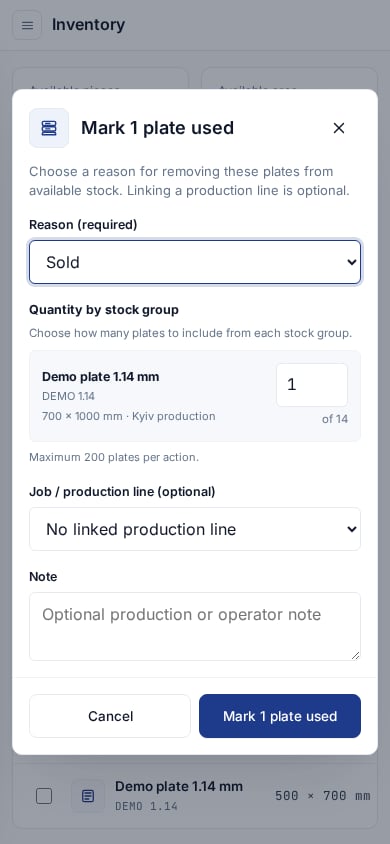
Mobile forms keep the required reason, quantities, and optional job link readable, with the actions at the bottom.
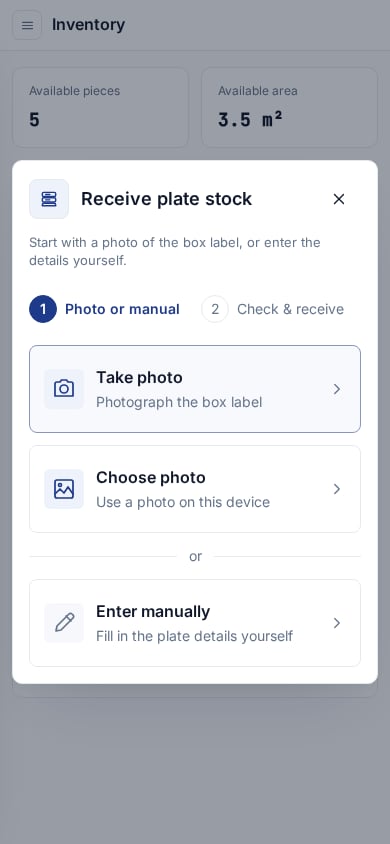
The phone layout keeps photo and manual entry easy to reach.
Reserve and consume a CDI sheet
The CDI workspace uses one actual inventory sheet per gang. Creating a draft changes that sheet from Available to Reserved. It is excluded from available stock and cannot be moved, split, used separately, or reserved for another gang. Cancelling a draft or queued gang requires a comment and releases the sheet back to Available. Remove queued work from Esko before cancelling it in Flexoworks; cancellation is unavailable after imaging completion. Send to queue locks the layout and keeps the sheet reserved. When the terminal team selects Finish imaging, Flexoworks changes it to Used and records the gang, operator, and time. One used sheet can therefore contain several individual plates from different jobs. It remains in stock history and cannot be reused. Linking stock with reason Used to a production line remains available for eligible legacy work. It requires matching material, location, and buffered dimensions and does not advance a job. Sold and Defect can reference a matching line for context. Unlinked manual use does not fulfill a job. Individually tracked work consumes stock through its CDI gang.What a job shows when material is unavailable
Job details include a Material availability card for every Printing plate production line. It first accounts for plates already assigned to gangs or covered by stock use, then checks Available stock of the selected material at the job’s location. A plate counts only when its dimensions can contain the production line’s size plus its effective buffer; a 90-degree rotation is allowed.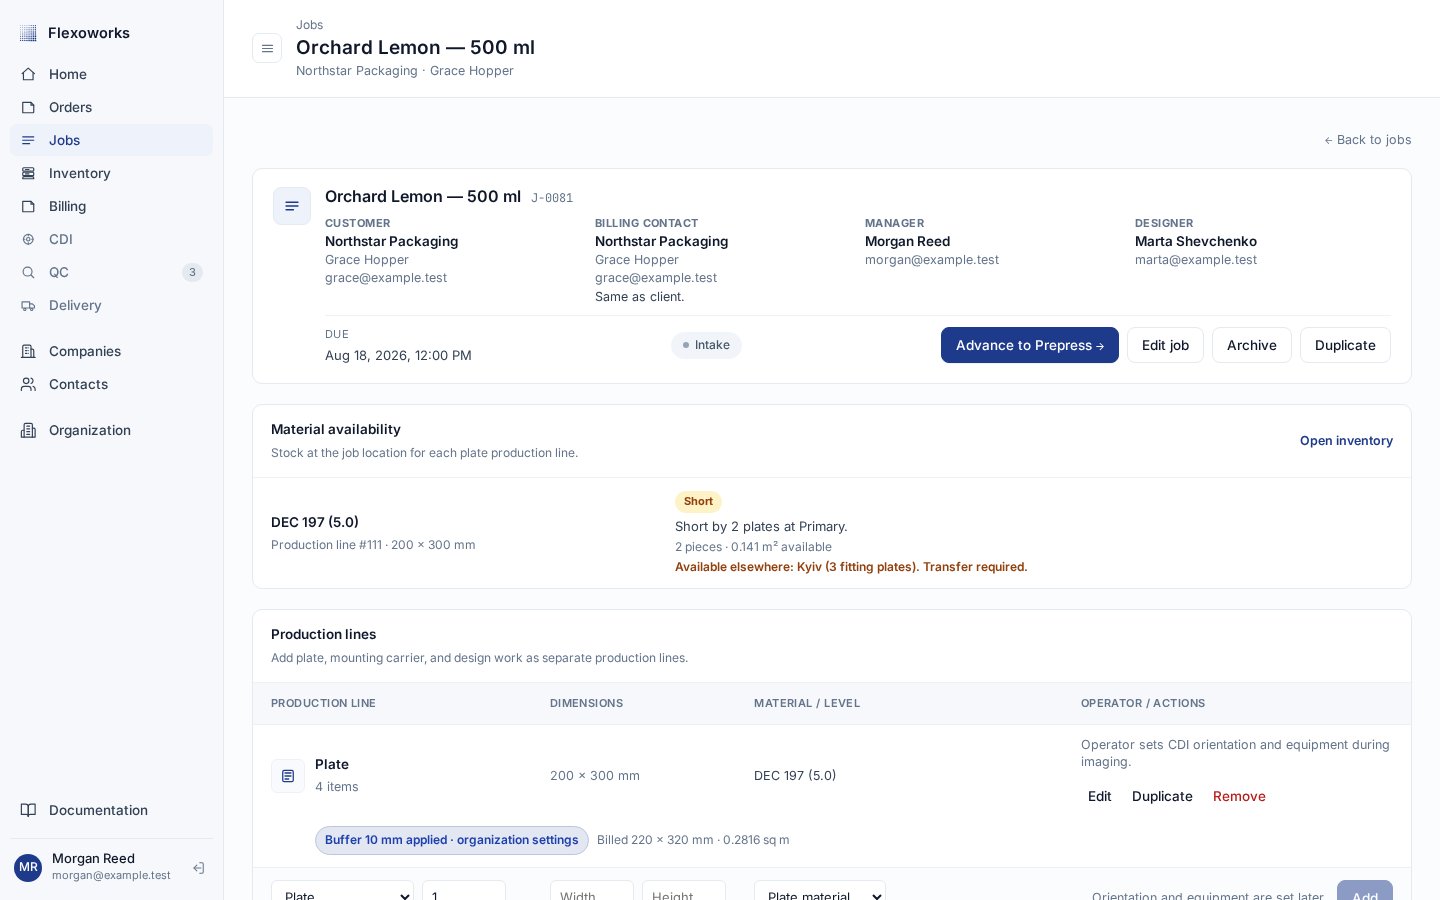
The job reports a local shortage and points to fitting stock at another location when a transfer can resolve it.