

.cdi layouts to DFS. The operator still opens the layout
in DFS, checks the CDI and exposure preset, and submits it. See
CDI workspace for the production workflow.
Before you start
- A 64-bit Windows 11 workstation on the DFS/CDI network and permission to install software as a Windows administrator.
- A Flexoworks account with the Org admin role and the CDI equipment already listed in Organization → Locations & equipment.
- The CDI hostname or IP address used by DFS. Copy it from DFS → Edit Device List; the service does not scan the whole network.
- The exact DFS folders to inspect and permission for the Windows service account to read them. The operator can help identify these folders.
- Outbound HTTPS access to the Flexoworks API and file storage for downloads and evidence uploads. The cloud connection does not require an inbound internet port or a VPN. The workstation still needs local network access to the CDI and DFS shares.
1. Download the installer and configuration
Open Organization → CDI services in Flexoworks and select Download Windows service. SaveFlexoworks-CDI-Service.zip so you can
transfer it to the Windows workstation.
Click Add workstation to open the registration window, then fill in:
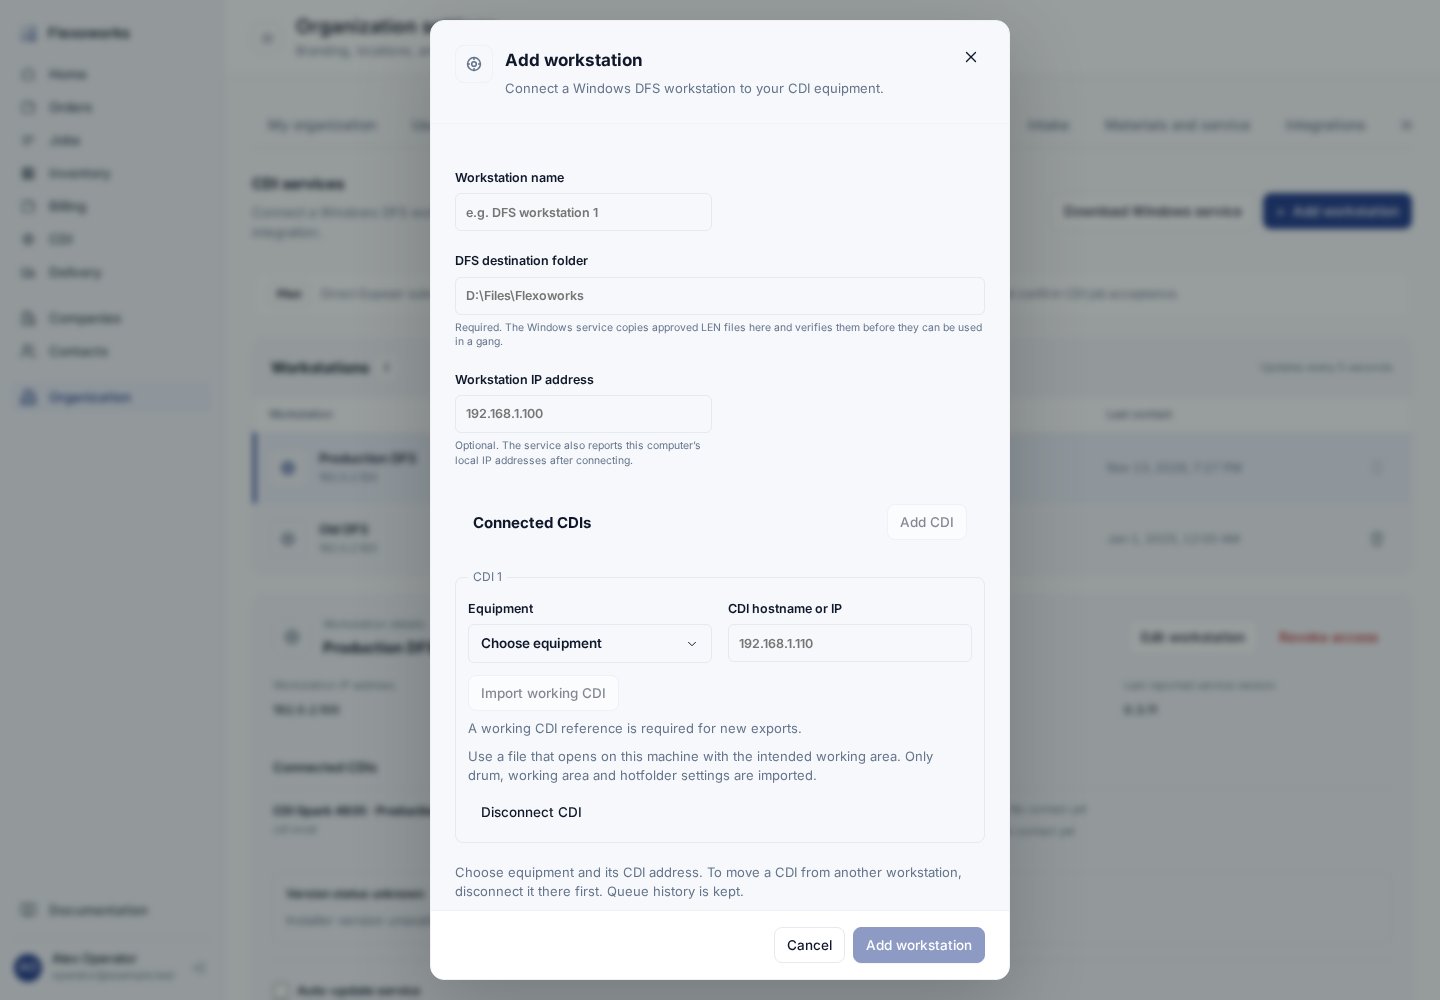
Register the workstation, set its DFS destination, and configure each CDI.
service.json to the Windows workstation. Download the configuration
before refreshing or leaving this page: its download is available only during
the current setup session.
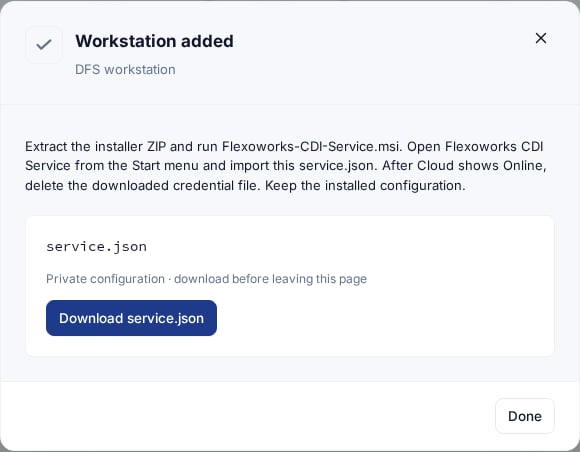
Download service.json after creating the workstation. This file pairs the service with your organization.
2. Install the MSI on Windows
- Close any older portable service window on this computer.
- In File Explorer, extract
Flexoworks-CDI-Service.zip. - Double-click Flexoworks-CDI-Service.msi in the extracted folder.
- Follow the installer, keep the default installation folder, and approve the Windows administrator prompt when it appears.
- Open Start → Flexoworks → Flexoworks CDI Service after installation. Opening the setup application also requires administrator permission.
Data folders; do not create them manually.
Before pairing, a waiting-for-configuration or starting status is expected.
3. Import the configuration
Choose English or Українська using the selector at the bottom of the setup window. Select Import configuration…, open the downloadedservice.json, and acknowledge the confirmation.
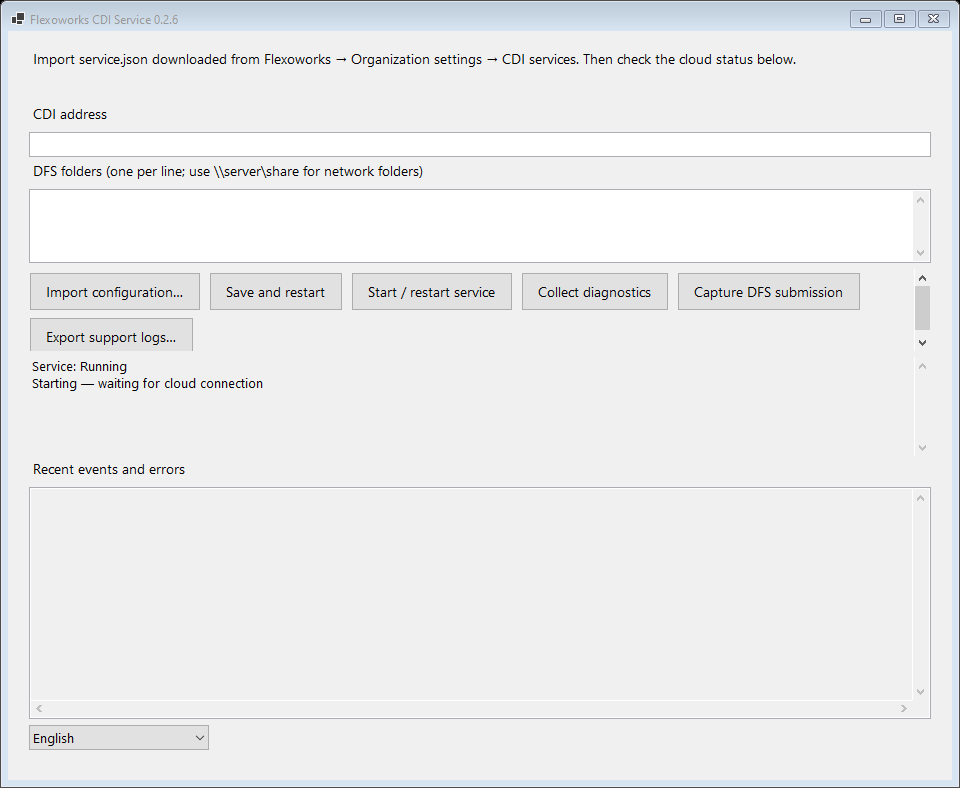
The Windows setup window before import. After pairing, it also shows service status and recent errors.
Manage a workstation’s CDIs
In Organization → CDI services, select the station and choose Edit workstation. Set its IP address, choose existing equipment, and enter each controller’s hostname or IP. Use Add CDI or Disconnect CDI to change the list, then Save workstation. To move equipment to another station, disconnect it from the original station first. Changing or disconnecting a CDI cancels its pending commands. Commands already running continue to completion. These are the same equipment records shown in Locations & equipment and the CDI workspace. The station’s Online state and Last contact describe the Windows service. Each CDI separately shows Last connected, Last checked, and connection status. For a hostname, the service reports the IP it reached. An unreachable CDI keeps its last successful queue. Changing an address starts fresh connection checks and preserves the previous address’s queue history. Choose CDI for diagnostics before collecting diagnostics or starting a capture. Updating assignments does not require a replacement credential or importing anotherservice.json.
Import the working area
Before exporting a Flexoworks gang, open Edit workstation and use Import working CDI for the target controller. Choose a readable.cdi
file smaller than 64 KB that opens correctly on that machine with the
intended working area, then Save workstation.
Only drum, working area, and hotfolder settings are imported. The reference
does not choose the artwork or exposure preset. Changes apply to new exports;
an existing export keeps the geometry it was created with. If export reports
missing geometry, import the reference and create a fresh export.
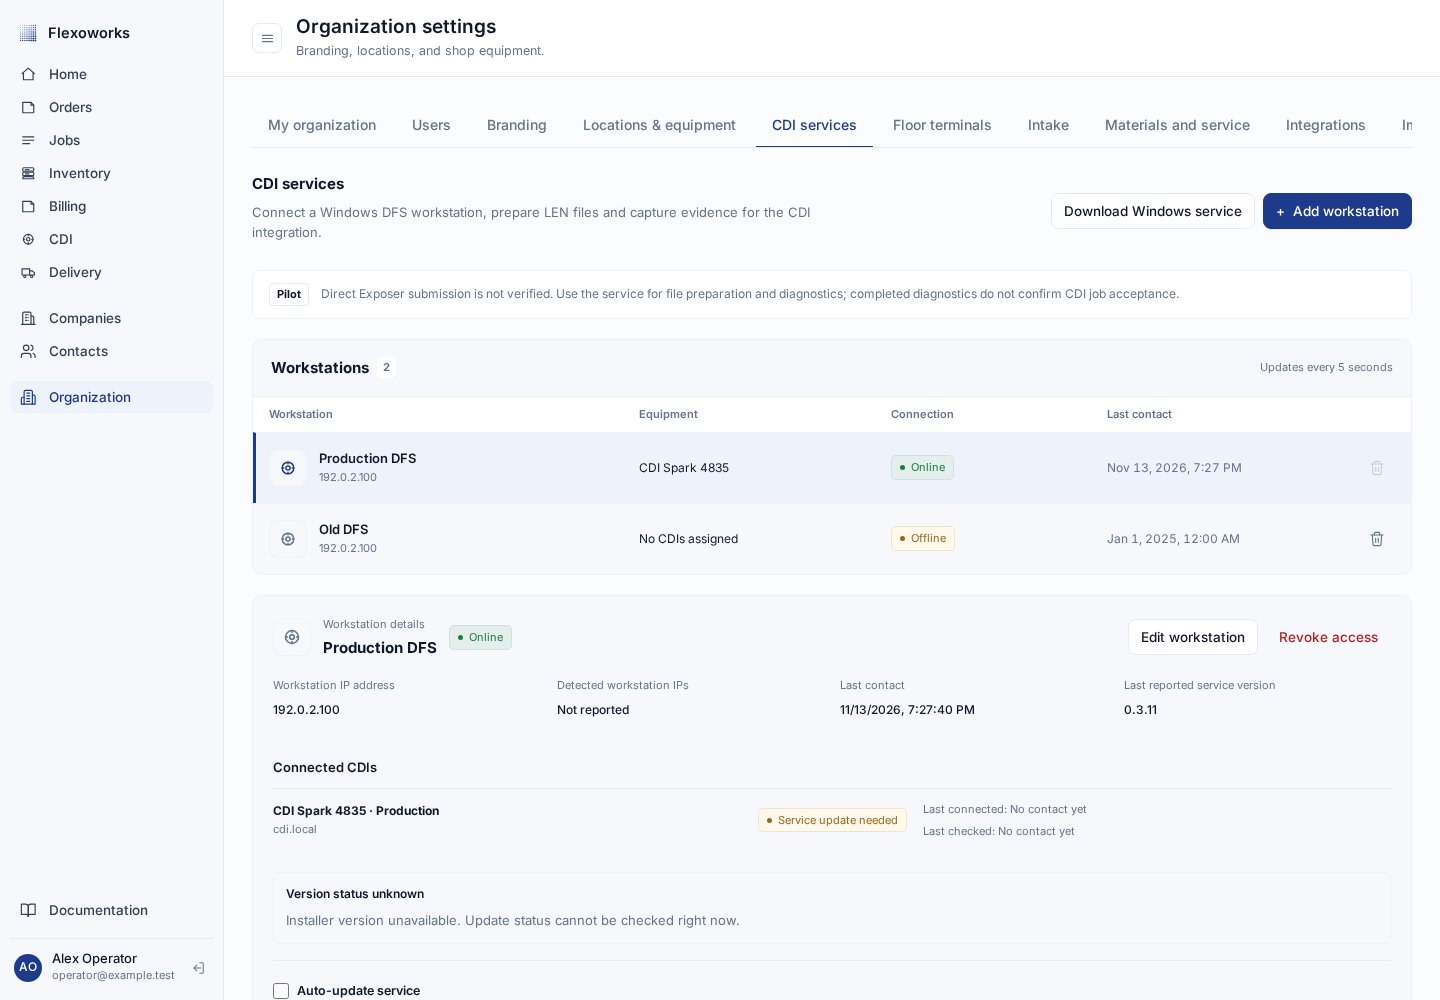
Check service availability and each controller separately before using its DFS destination.
4. Check DFS folders and service access
Check that the service can write to the DFS destination folder. This is separate from DFS folders to capture, which are used for diagnostics. Ask the operator to show where DFS keeps saved layouts, configuration, logs, and job output. Use the folders from this installation; there is no single default path for every DFS station. For a mapped network drive, use its underlying UNC path. For example, ifZ: maps to \\dfs-station\DFS, enter \\dfs-station\DFS\Layouts
instead of Z:\Layouts. Enter one folder per line and select only the
folders needed for capture, rather than an entire drive.
The service runs as LocalSystem by default. A folder you can open in
File Explorer may still be inaccessible to that service. Ask IT to grant the
service identity access or configure an appropriate account in Windows
Services. After an account change, open the service setup as administrator
before starting the service so its local data permissions are updated. Do not
put network passwords in paths. A custom service account also needs the
Windows permissions required for network capture.
5. Verify the connection and diagnostics
- In Windows, wait for Service: Running and Cloud: Connected to Flexoworks. A running service alone does not confirm a working cloud connection.
- Return to Organization → CDI services and choose the new Workstation.
- Check Online, a recent Last contact, and that Service version matches the version you installed. The page refreshes automatically.
- Select Collect diagnostics. Watch Recent commands and Diagnostic log. Expand events for details; use Warnings and errors to focus on failures.
- Confirm that the configured DFS folders are accessible to the service. Inspect the CDI connectivity results and download the ZIP under Evidence bundles when it appears.
service.json
and any transfer copies. Keep the installed configuration in
C:\ProgramData\FlexoworksCdiAgent.
The service starts automatically after Windows restarts, before user sign-in.
You can close the setup window while the service keeps running; reopen it
from Start when needed. At a convenient time, restart the workstation and
verify a fresh Last contact in Flexoworks.
Capture one DFS submission
Once the connection and folder access work, coordinate a known test job with the operator:- Select Capture DFS submission in the cloud or Windows setup window and confirm the request.
- Wait for Capture ready — send the test job through DFS now in the
cloud log, or
CAPTURE_READYin the Windows log. - Have the operator submit that one test job through the existing DFS workflow.
- Let the 120-second capture finish. Download its ZIP from Evidence bundles.
If something does not work
Export logs
Select Export support logs… in the Windows window. The ZIP includes recent service events, status, available startup errors, and the recorded MSI installation log. Text logs are redacted; raw packet capture bundles are separate. If setup cannot open, IT can use Command Prompt as administrator:agent.json downloads.
This works even if the service cannot create its primary Data folder.
Startup errors may also be in %TEMP%\FlexoworksCdiAgent,
C:\Windows\SystemTemp\FlexoworksCdiAgent, or the older
C:\Windows\Temp\FlexoworksCdiAgent location.
For an installation failure, run the MSI from its extracted folder with a
known log filename:
service.json.
Update, repair, or remove
In Organization → CDI services, select the workstation and enable Auto-update service to install new versions when the service is idle. This is off by default and requires version 0.2.4 or later running under LocalSystem. Windows does not restart automatically. You can also install a newer MSI manually on the same computer. Configuration and evidence are retained. Afterward, check the version and fresh cloud contact. Repair or uninstall through Windows Installed apps when needed. Uninstalling preserves configuration and evidence inC:\ProgramData\FlexoworksCdiAgent; it does not revoke cloud access.
Click a workstation row to view its details. Use Revoke access when retiring
an online workstation. To remove an offline, unused, or revoked station from the
list, click the trash icon beside its row and confirm Remove workstation.
Removal revokes its cloud access and retains diagnostic history. Reconnecting
requires a new workstation registration.